The Perfect Crème Brûlée – 5 Ingredients
Primal Edge Health participates in the Amazon Services LLC Associates Program and other affiliate programs and therefore, may collect a share of sales or other compensation from the links on this page. This comes at no additional cost to you, and all the prices and availability are accurate at the time of publishing.

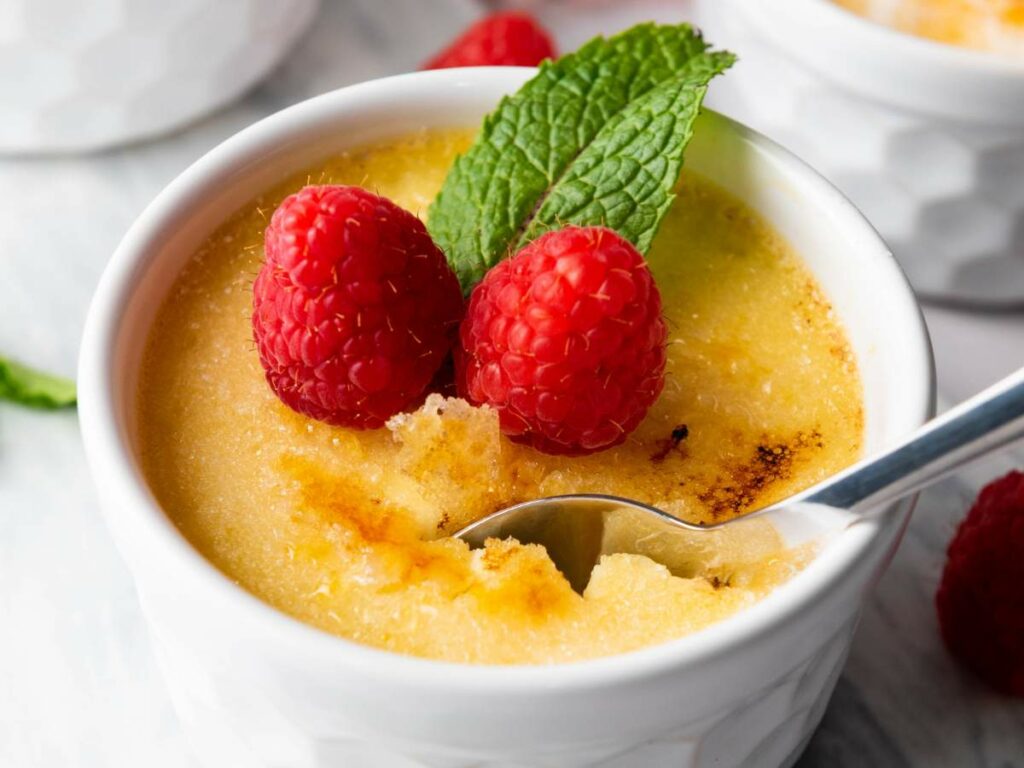
This easy creme brulee is a rich, creamy classic with a crisp sugar shell that cracks perfectly with each spoonful. This version keeps it simple but true to tradition, making it a go-to dessert for special occasions or when you want to enjoy something guilt-free. Great for make-ahead entertaining with just a quick torch finish before serving.

There’s nothing better than digging into freshly made custard for some comfort. I’ve shared quite a number of recipes here, like carnivore custard, no-bake keto custard, and no-bake peppermint custard.
Homemade custard is delicious as is, but is made more indulgent topped with fresh berries or better yet, with caramelized sugar on top. If you’re a fan of custard desserts with naturally high-fat and low-fiber ingredients, I’m confident you’ll love this homemade creme brulee!
Why You’ll Love This Recipe
- Easy, everyday ingredients: This recipe requires only 5 pantry staples you probably already have at home.
- Insanely good: The contrast between the cool, velvety custard and the shatteringly crisp caramelized sugar is just pure bliss.
- Naturally gluten-free: Contains zero flour or gluten, but doesn’t sacrifice any of that indulgent texture.
- All-occasion treat: For birthdays, date nights, dinner parties, or slow Sunday afternoons when you want to make something special for yourself or family.
- Make-ahead friendly: Chills beautifully, making it a great make-ahead dessert for meals or for entertaining.
- Versatile: Don’t have a kitchen torch? No problem. The broiler works just fine to caramelize the top and give you that signature crunch.

How to Make Crème Brûlée
This classic creme brulee comes together with just 5 ingredients and 15 minutes of prep time, plus baking and chilling. You’ll simply make the custard base, bake it in a water bath, chill until set, and finish with a crisp, caramelized sugar top just before serving. You’ll be surprised how easy it comes together, especially after taking your first bite!
Scroll to the bottom of this post for a printable recipe card with a full list of ingredients, measurements, and step-by-step instructions.
Ingredients You Need
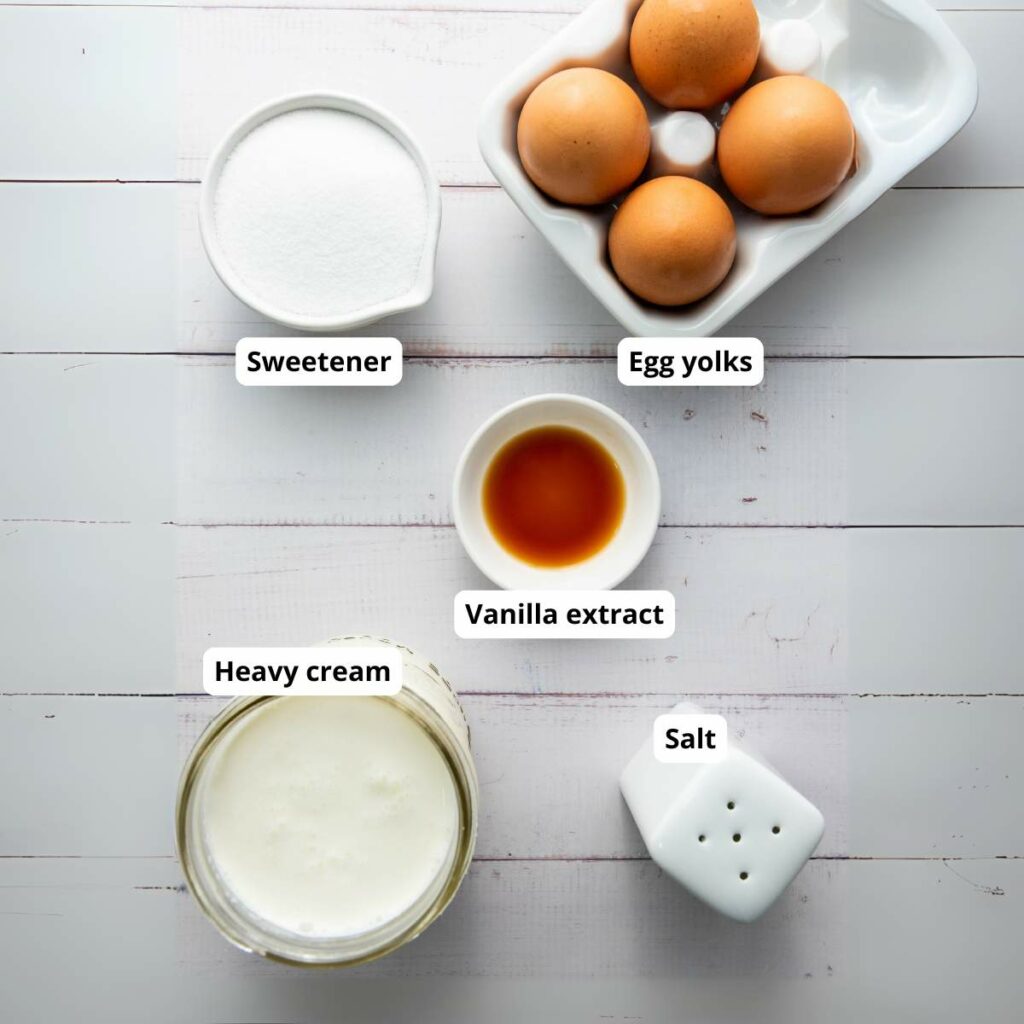
- Heavy cream: For that signature richness and silky-smooth texture. Avoid low-fat or fat-free alternatives and use full-fat heavy cream to achieve the creamiest custard.
- Vanilla extract: If possible, use real vanilla extract, and not the artificial kind. You’ll be able to taste the difference!
- Egg yolks
- Granulated sugar: Divided to sweeten the custard and for topping. Use your choice of keto or 0-calorie sweeteners. In my experience, allulose is the best choice for caramelizing the top as it melts like sugar and browns well. Erythritol and monk fruit blends like Lakanto or Swerve are great for the custard, but won’t caramelize quite as nicely.
- Salt
Step-By-Step Instructions
Making creme brulee might sound fancy, but it’s surprisingly straightforward once you break it down. Follow these step-by-step instructions and you’ll have a dessert that looks impressive, tastes incredible, and feels totally doable, because it is.

Step 1: Prepare the custard base
Preheat your oven to 325 F.
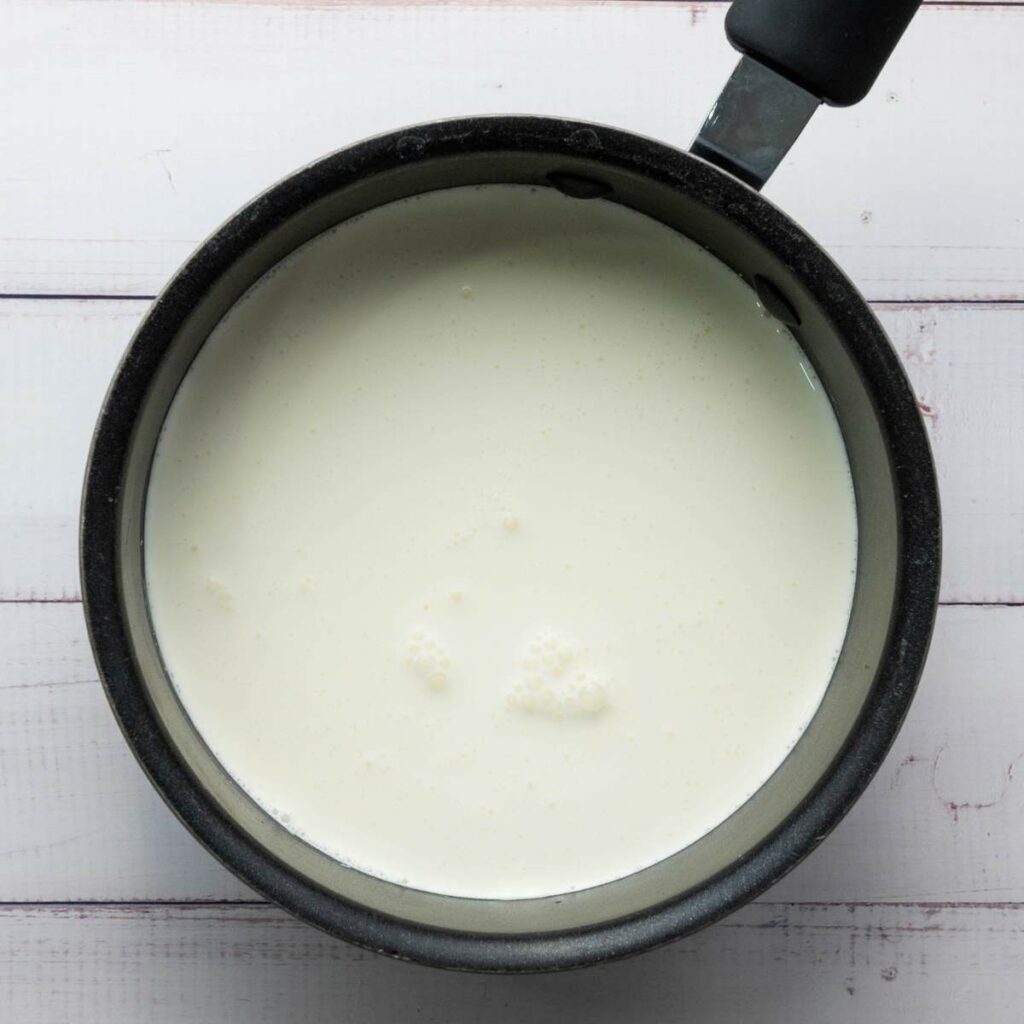
Warm the heavy cream over medium heat in a medium saucepan until it just starts to simmer. Do not boil. Remove from heat and stir in vanilla extract.
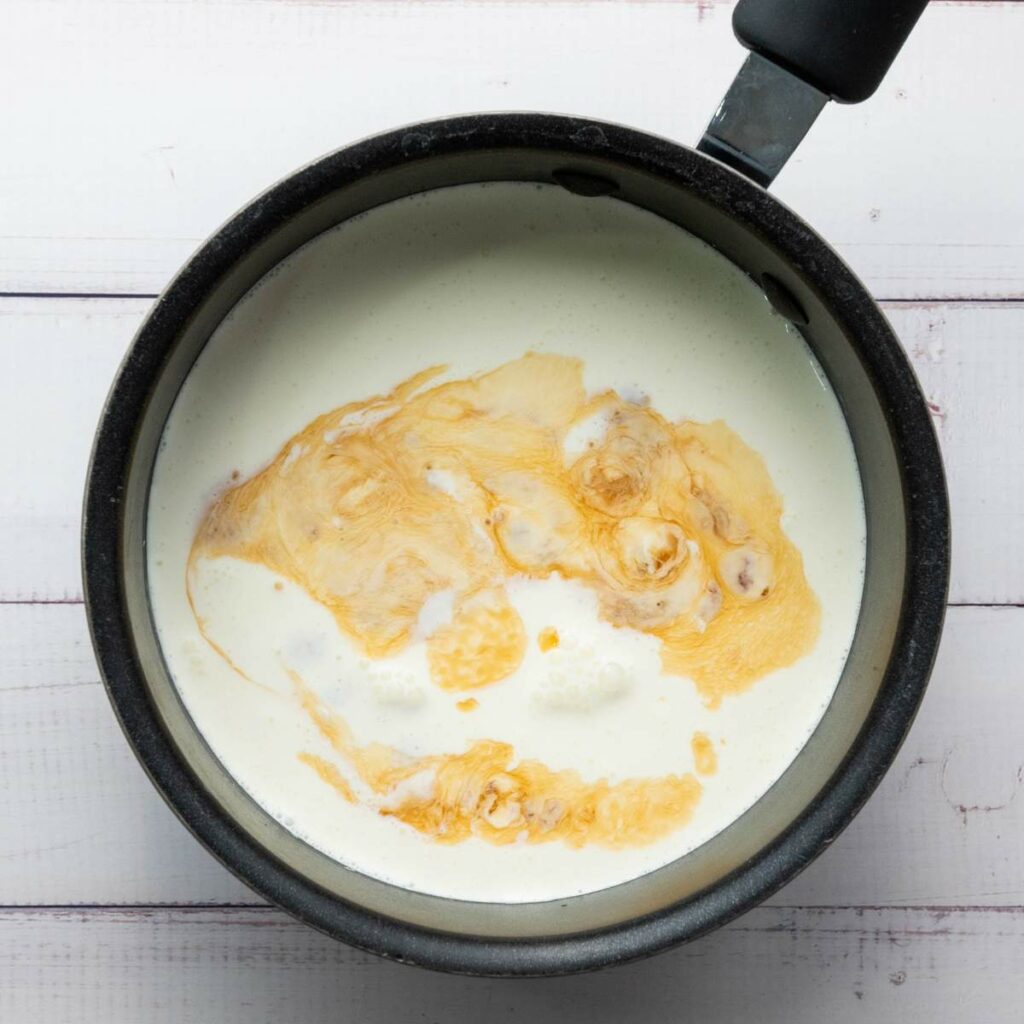
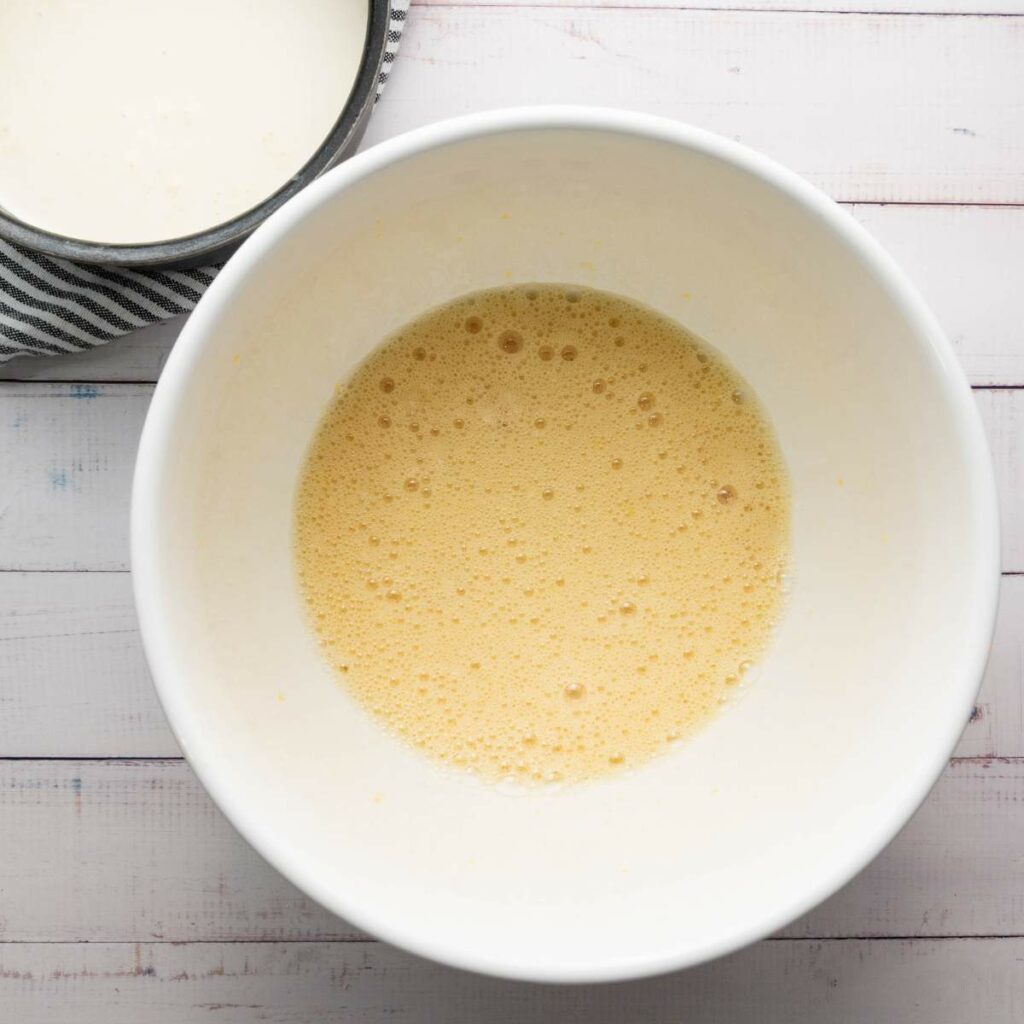
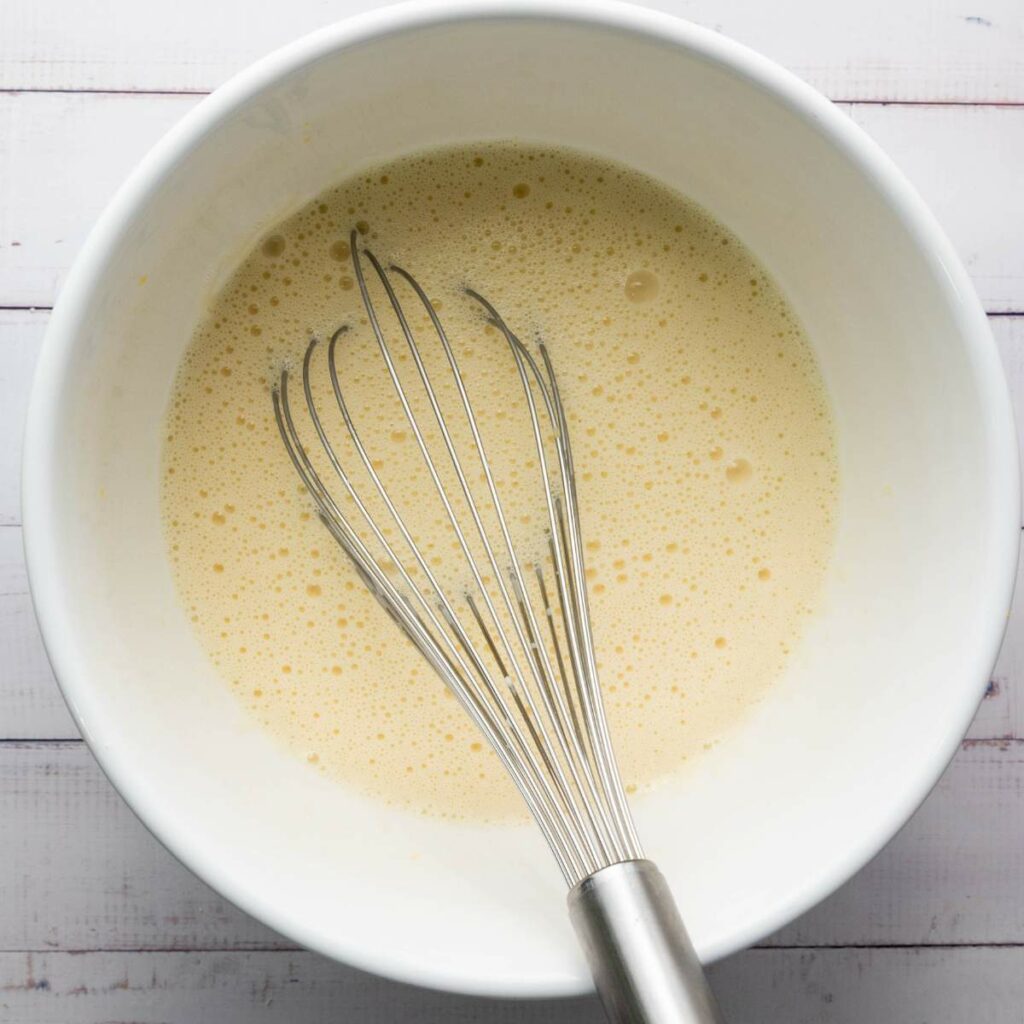
Next, whisk egg yolks in a large bowl, with ¼ cup granulated sugar and salt until pale and thick. Slowly pour the warm cream into the yolk mixture, whisking constantly to avoid curdling.
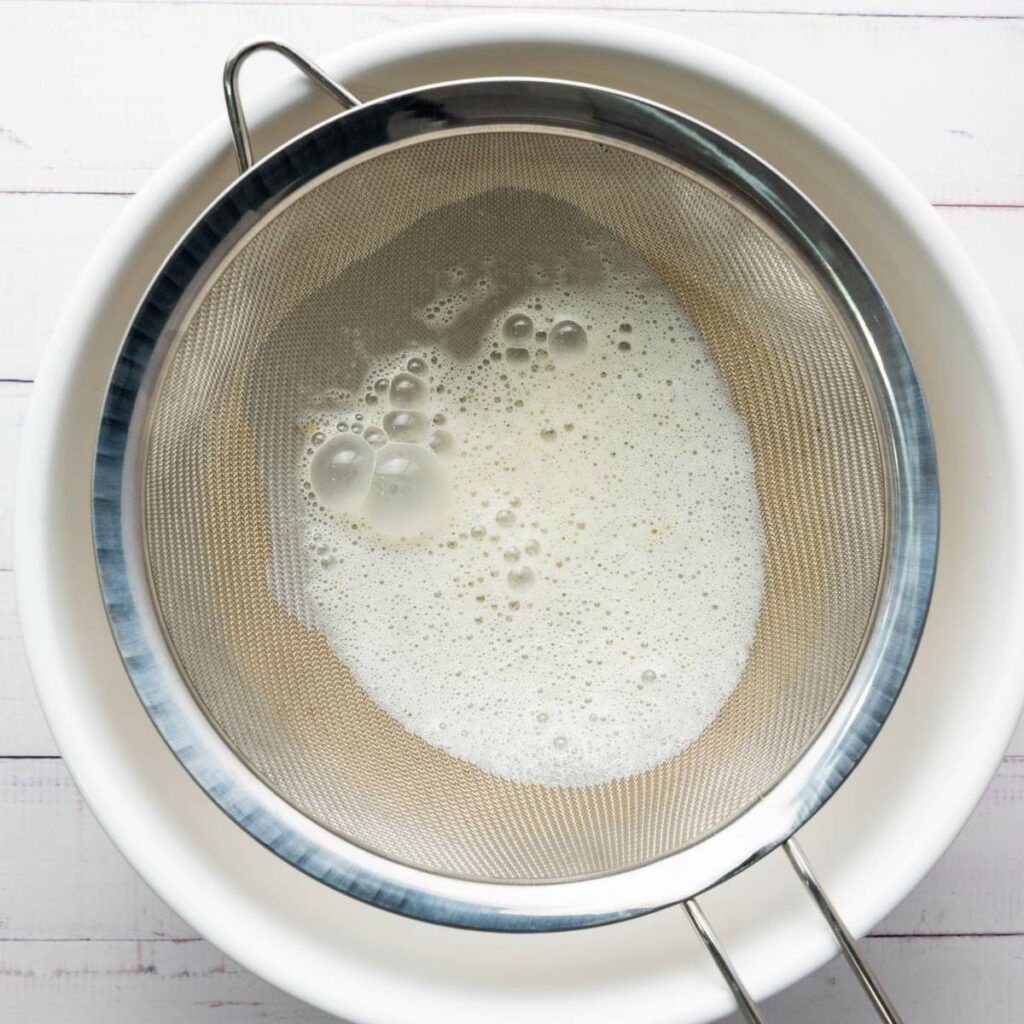
Strain the mixture through a fine mesh sieve into a pourable bowl or measuring cup. This removes chalaza (the white stringy part) for a smoother custard.
Step 2: Bake
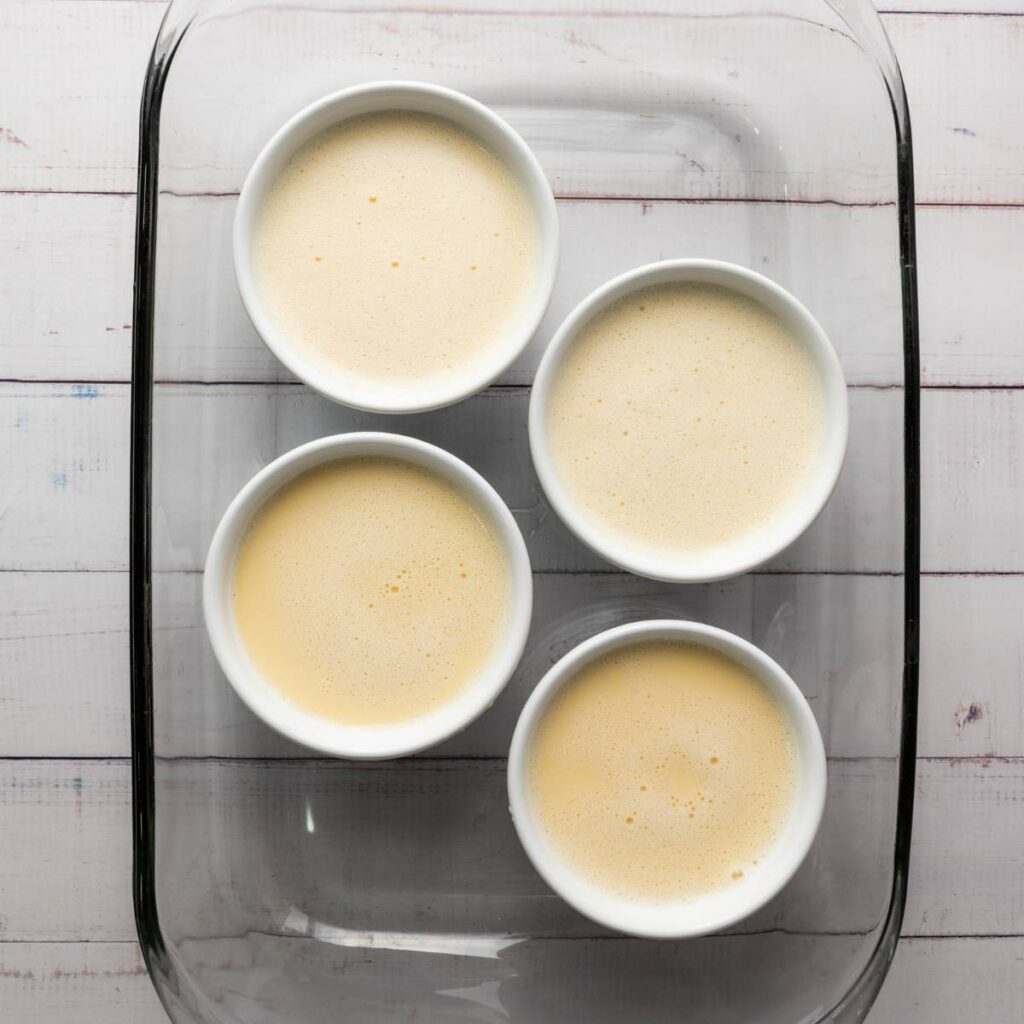
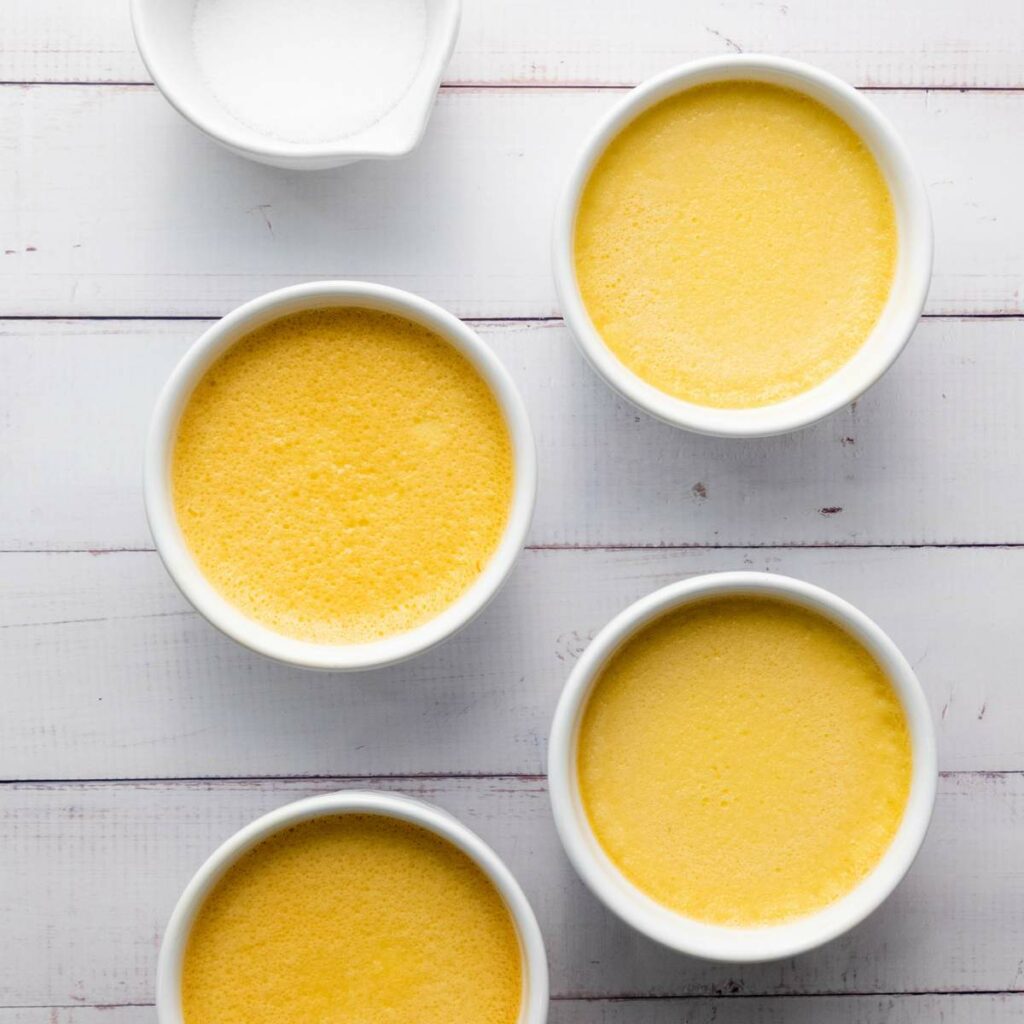
Divide evenly between 4 (6-ounce) ramekins and place them in a large baking dish.
Carefully pour hot water into the dish until it reaches halfway up the sides of the ramekins.
Bake for 35 to 40 minutes until the custards are just set but still jiggle slightly in the center.
Step 3: Cool and chill
Remove ramekins from the water bath and let them cool to room temperature. Cover with plastic wrap and chill for at least 2 hours or until cold.

Step 4: Caramelize the sugar
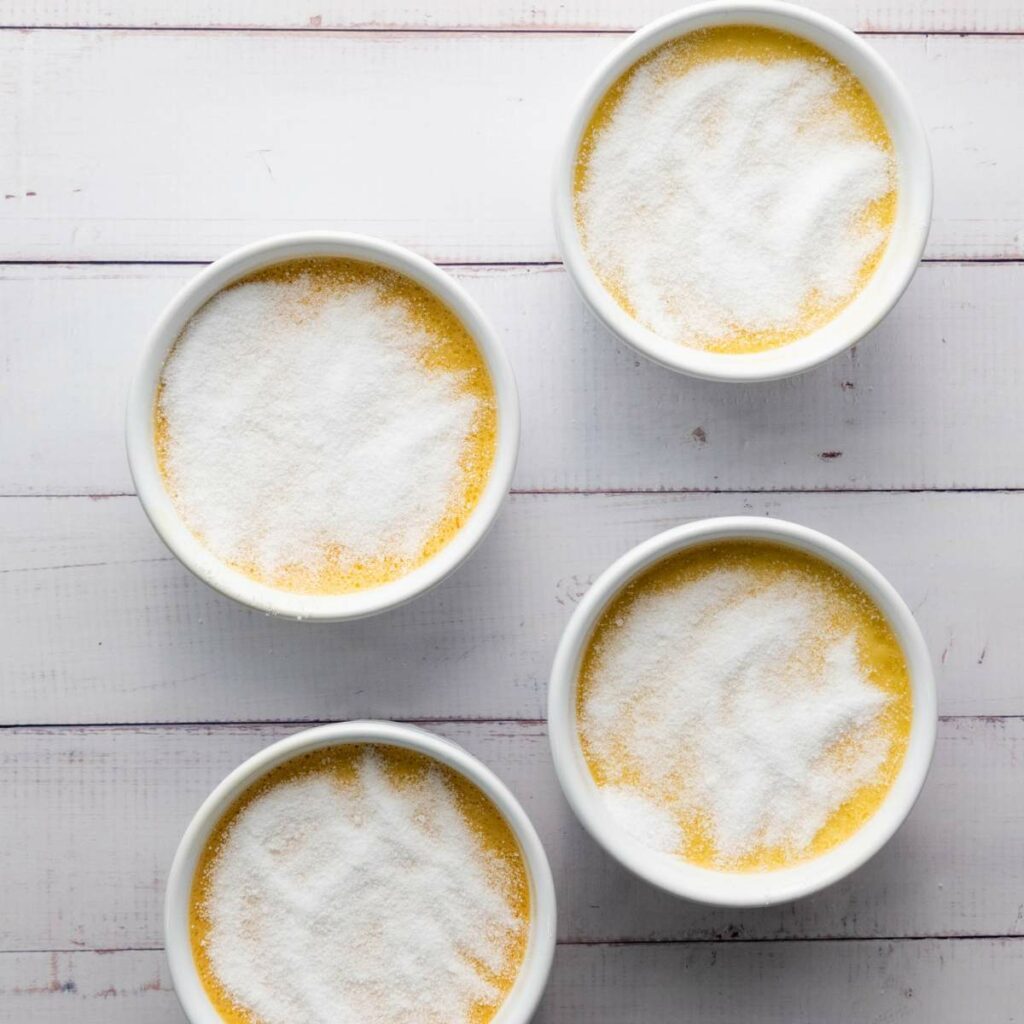
Just before serving, sprinkle each custard with about 1 tablespoon of sugar or allulose per ramekin. Apply it in an even layer. Caramelize using a kitchen torch or under a broiler for 1 to 2 minutes.
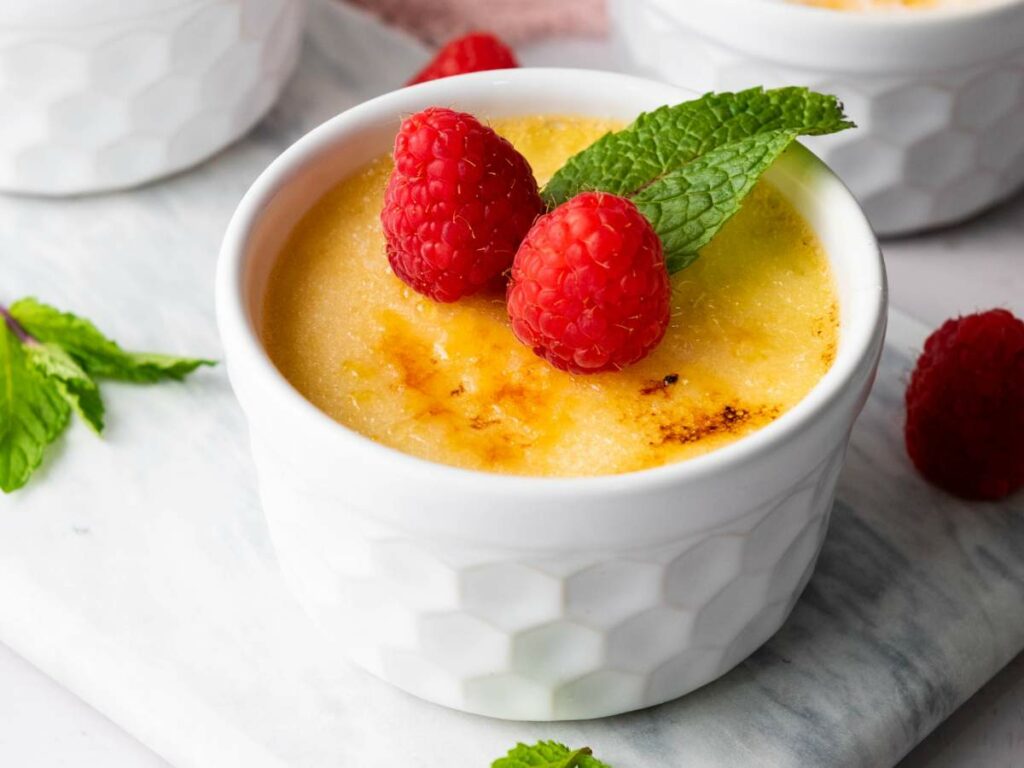
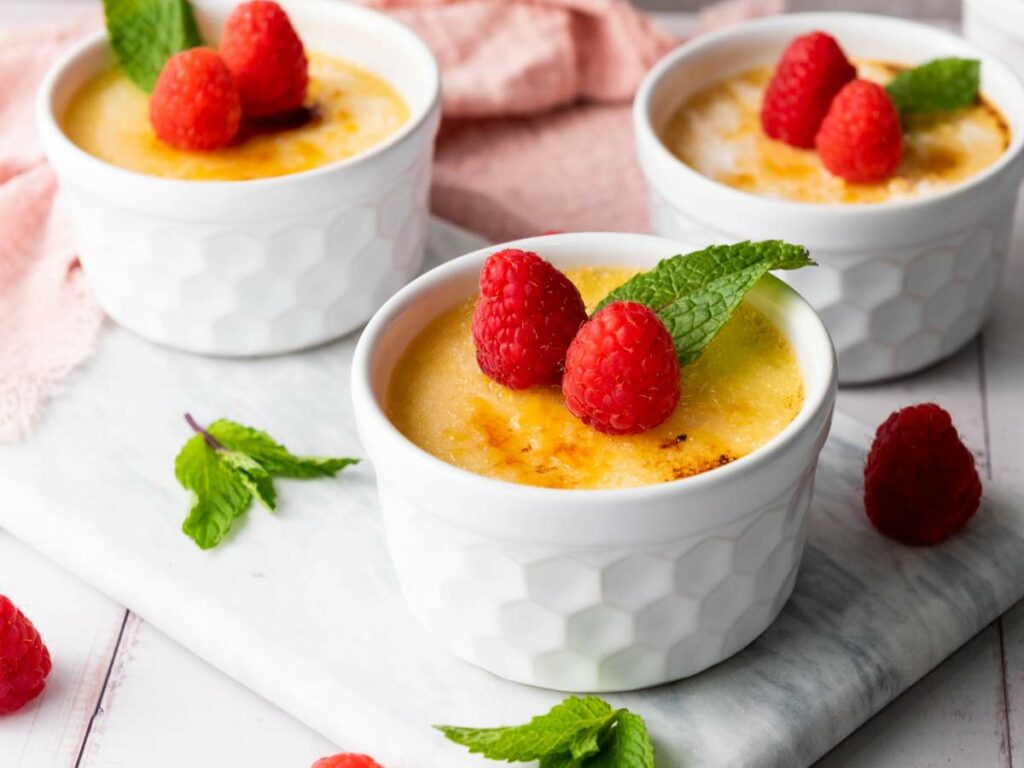
Step 5: Cool the sugar and serve
Let the sugar crust cool and harden for a few minutes before serving.

Expert Tips
- Temper the eggs slowly: When adding the warm cream to the egg yolks, do it gradually while whisking constantly to keep the eggs from scrambling and achieve a silky custard.
- Use shallow ramekins: Wide, shallow ramekins help the custard set evenly and give you more surface area for that crackly sugar topping.
- Bake the custards right: Custards should still have a wobble in the center when you take them out of the oven. They’ll finish setting as they cool. Overbaking leads to a grainy or rubbery texture.
- Don’t skip the chill time: Proper chilling allows the custard to fully set and makes the sugar topping easier to caramelize without melting into the custard. Chill for at least 2 hours, but overnight is better.
- Torch in circles: When caramelizing, move the torch in circles to evenly melt the sugar. Holding it in one place too long can burn the sugar before it melts properly.
- No torch? No problem: A kitchen torch is best for even caramelization, but the broiler works in a pinch; just keep a close eye on it. You can make the custards a day in advance and torch just before serving for the best texture.
How to Store This Recipe
Cool completely, cover each ramekin tightly with plastic wrap, then store in the refrigerator for up to 3 days. If you want to re-crisp the topping, you can add a fresh layer of sugar and use a kitchen torch or broiler again to caramelize.
If you made the custard ahead, wait to sprinkle and caramelize the sugar topping until just before serving. Blot the moisture on the top of the stored custard before adding the sugar.
What to Serve with Crème Brûlée
Creme brulee is a star on its own, but you can add a little flair by serving it topped with fresh berries, sugared cranberries, or shaved chocolate. This dessert is also delicious paired with coffee or tea – we love it with ashwagandha coffee, Tibetan butter tea, or hot chocolate!
More Easy Dessert Recipes To Try
- White chocolate raspberry mousse
- Cheesecake fluff
- No bake eggnog cheesecake pudding
- Walnut and cardamom white chocolate bites
- Chia seed pudding

5-Ingredient Crème Brûlée Recipe
Video
Ingredients
- 2 cups heavy cream
- ½ teaspoon vanilla extract
- 4 large egg yolks
- ¼ cup granulated sugar or keto sweetener
- ⅛ teaspoon salt
- 4 tablespoons granulated sugar or allulose if keto, for topping
Directions
- Preheat oven to 325 °F.
- Warm the heavy cream over medium heat in a medium saucepan until it just starts to simmer. Do not boil. Remove from heat and stir in vanilla extract.
- In a large bowl, whisk egg yolks with ¼ cup granulated sugar and salt until pale and thick.
- Slowly pour the warm cream into the yolk mixture, whisking constantly to avoid curdling.
- Strain the mixture through a fine mesh sieve into a pourable bowl or measuring cup.
- Divide evenly between 4 (6-ounce) ramekins and place them in a large baking dish.
- Carefully pour hot water into the dish until it reaches halfway up the sides of the ramekins.
- Bake for 35–40 minutes until the custards are just set but still jiggle slightly in the center.
- Remove ramekins from the water bath and let them cool to room temperature. Cover with plastic wrap and chill for at least 2 hours or until cold.
- Just before serving, sprinkle each custard with about 1 tablespoon of sugar or allulose per ramekin. Apply it in an even layer. Caramelize using a kitchen torch or under a broiler for 1–2 minutes.
- Let the sugar crust cool and harden for a few minutes before serving.
Notes
- Wide, shallow ramekins help the custard set evenly and give you more surface area for that crackly sugar topping.
- Custards should still have a wobble in the center when you take them out of the oven. They’ll finish setting as they cool.
- When caramelizing, move the torch in circles to evenly melt the sugar.
- No torch? No problem. A broiler works in a pinch; just keep a close eye on it.
Nutrition & Macros
To obtain the most accurate representation of the nutritional information in a given recipe, please calculate the nutritional information with the actual ingredients and amounts used, using your preferred nutrition calculator. Under no circumstances shall the this website and the author be responsible for any loss or damage resulting for your reliance on the given nutritional information.